

Quick Start
After installing Turbo Browser, follow these steps for basic setup.
1. Import from another browser
You can start import from either entry:
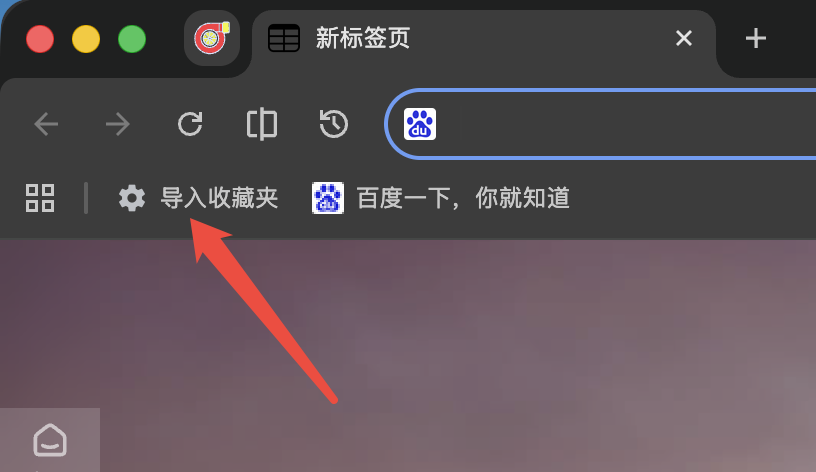
- Bookmarks bar — Click Import bookmarks
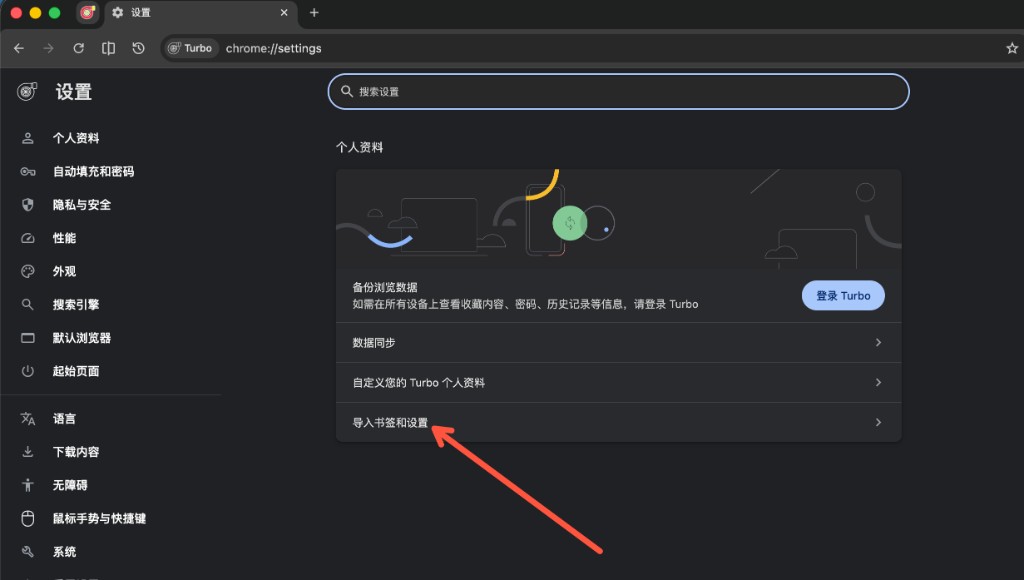
- Settings — Settings → Profile → Import bookmarks and settings
- Choose source: Chrome or Edge.
- Select bookmarks, passwords, autofill, extensions, etc. (extension import depends on the current build).
See Data Import for details.
2. Mouse gestures & boss key
- Open Settings, search for mouse gestures, or open the gestures panel.
- Enable gestures and review defaults; customize trail color, width, and action mappings.
- The default boss key is
Ctrl + Q(Control on both Windows and macOS) to hide or show the browser window; change it under Boss key in Settings.
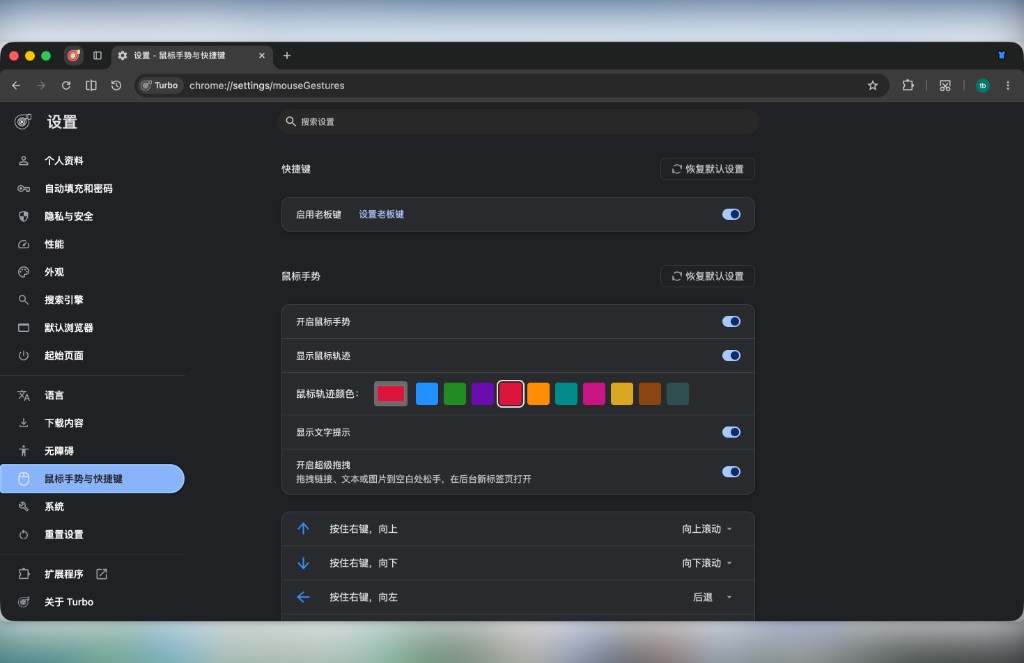
Mouse gestures & boss key: enable and customize the boss key, gesture trail, and action mappings in Settings
Full default mappings: Mouse gestures.
3. Screenshots
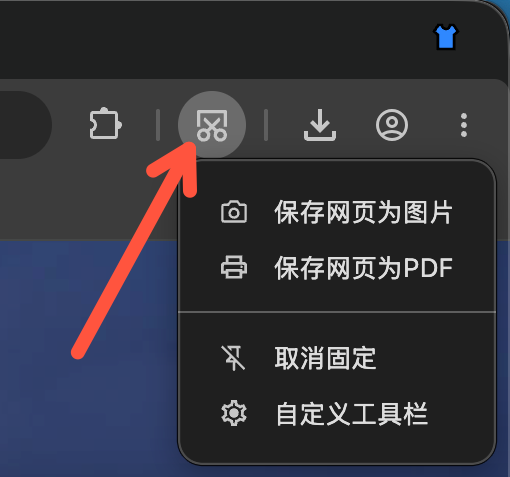
Turbo offers three capture modes. The toolbar screenshot button is the main entry:
- Left-click — Full-screen capture
- Right-click — Web page capture: save as image (including full page) or save as PDF
- Region capture — Press
Ctrl + Shift + X(Windows) orCmd + Shift + X(macOS) to select any area on screen.
Region capture on macOS may ask for Screen Recording permission the first time. See Screenshots and Shortcuts for details.
4. Tabs, address bar & appearance
- Use the Tab layout toggle on the left of the tab strip, or Settings → Tabs and bookmarks → Tab strip position, to switch horizontal/vertical tab layout; in vertical layout you can move the strip to the right. See Vertical tabs.
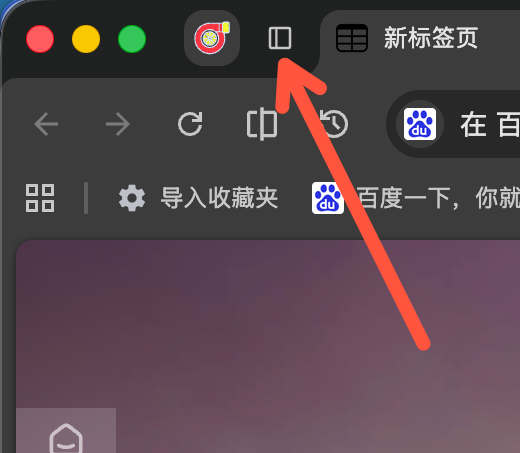
Vertical tabs: click the button on the left of the tab strip, or change tab position in Settings
- Toolbar Split view: split the window into two side-by-side panes. See Productivity → Split view.
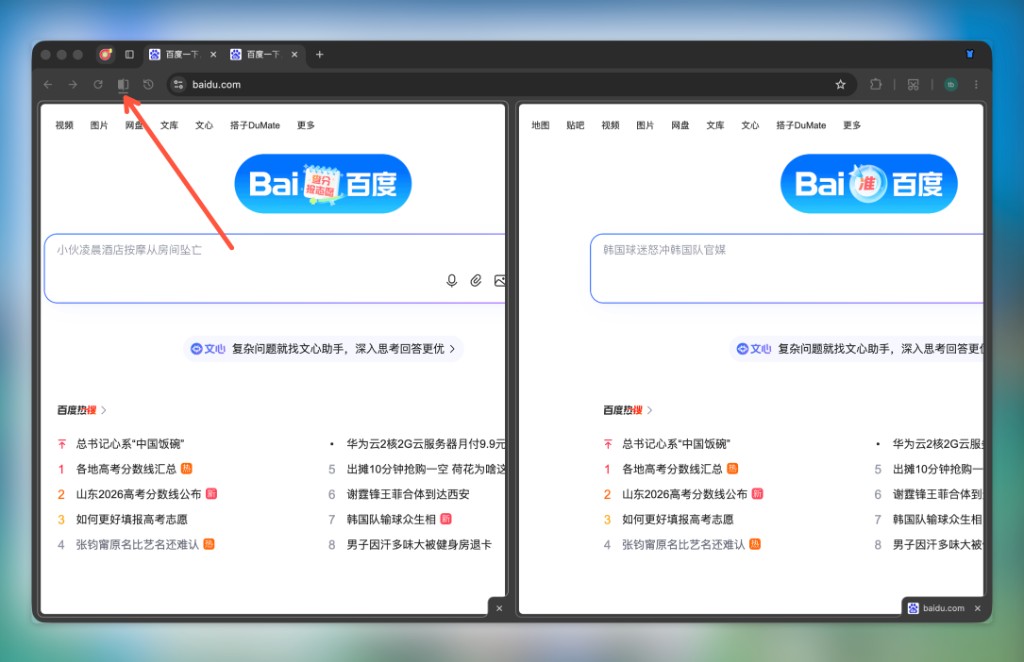
Split view: click the toolbar split button for two independent panes
- Right-click the tab strip New tab (+) button: Paste and open — opens a clipboard URL, or searches plain text with the default engine; toggle in Settings → Tabs and bookmarks. Use the app menu or
Ctrl+M/⌃⌘Mfor small account tabs. See Small account tabs. - Toolbar Restore page: left-click restores the most recently closed tab; right-click shows recent-closed items grouped by window / group / split view and opens in the current window.
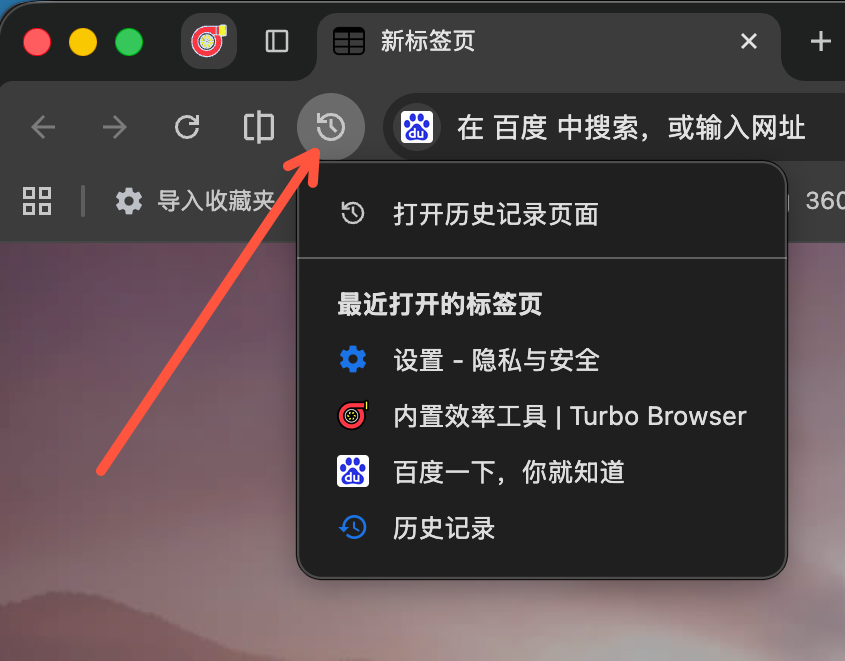
Restore page: left-click restores the most recently closed tab; right-click shows a window / group / split-view hierarchy
- Double-click a tab to close it; what happens when you close the last tab is in Settings → Tabs and bookmarks (default: open a new tab first). See Tabs → Close last tab.
- The new tab page is the Chromium default (Most visited can be toggled); Settings → On startup — default or a custom URL. See Tips → New tab page.
- Hover icons on the right of the address bar: Copy link, Scan QR code to share the current page.
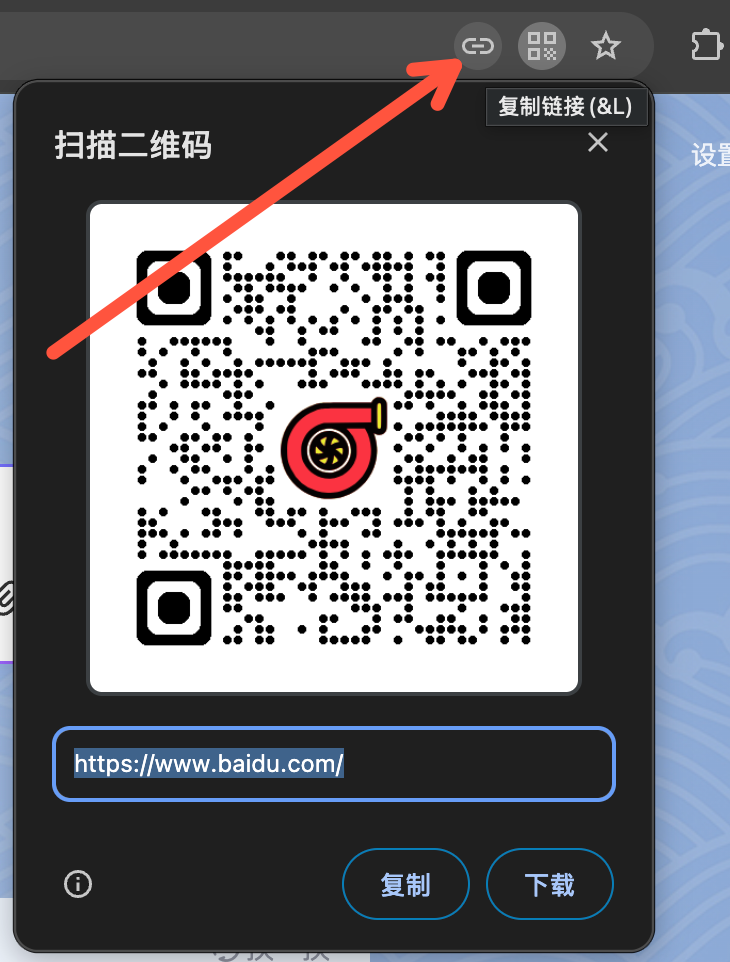
Address bar: hover the copy-link or QR code icon to quickly copy the link or share the page
- Title bar Appearance switches browser colors in one click; Themes opens the Edge theme store for more themes. See Productivity → One-click themes.
5. Immersive mode
For a larger content area, turn on Immersive mode: the tab strip and toolbar auto-hide; move the pointer to the top of the window to reveal them again.
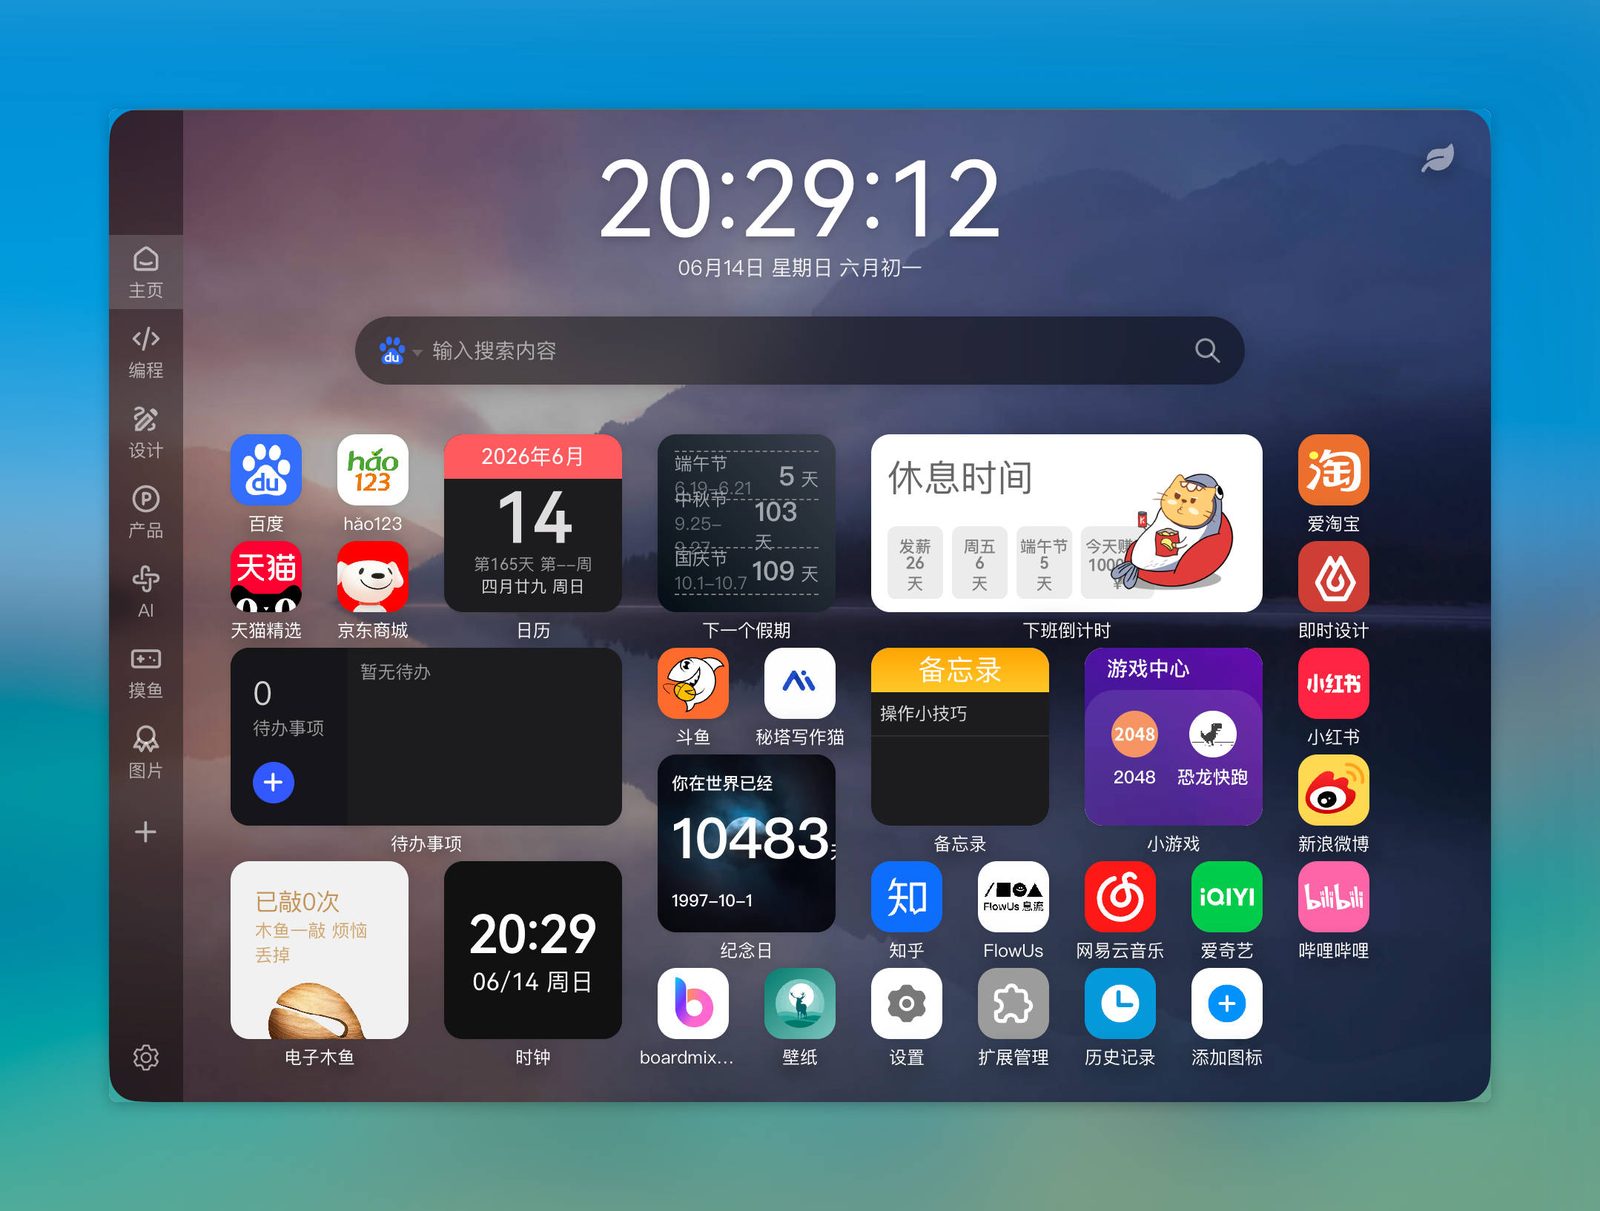
Immersive mode: tab strip and toolbar auto-hide for a larger content area; move the pointer to the top of the window to reveal the UI
- Toggle under Settings → Appearance, or press
Ctrl + F11(macOS:Cmd + F11) - Also available from the browser menu and the macOS View menu
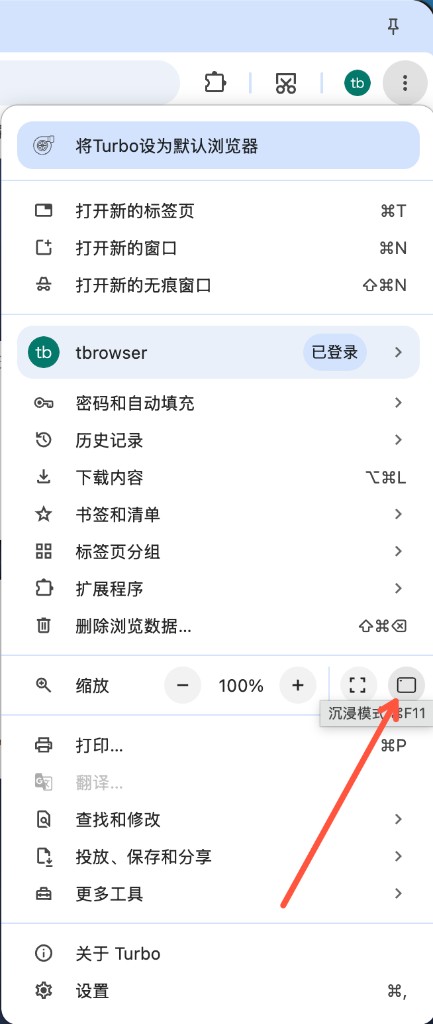
Menu → Zoom row → Immersive mode
- Keep window on top — always available on the title bar in immersive mode; outside immersive mode you can show it via Customize toolbar (no need to enter immersive mode)
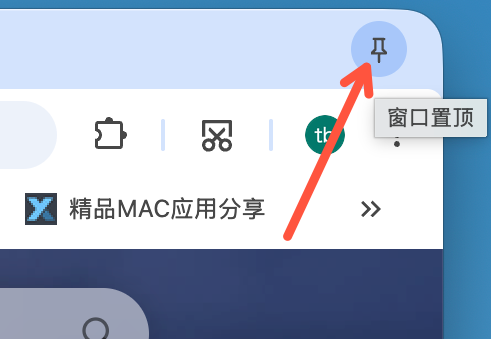
Keep window on top: title-bar pin; also available in Customize toolbar
Full details: Immersive mode.
6. Sign in and sync
Sign in to sync bookmarks, passwords, and more — easier to restore after switching devices or reinstalling.
- Click the avatar in the top-right and choose Turbo account or Google account.
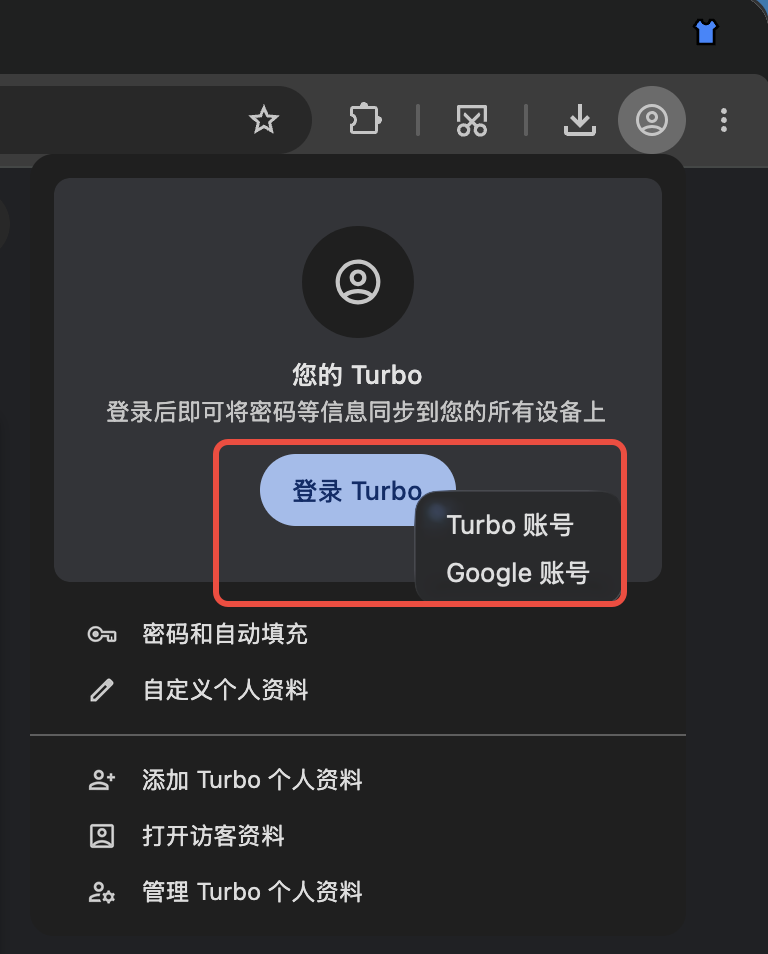
Dual sign-in: switch Turbo or Google account from the avatar menu, sign-in page, browsing data page, or history page
- Open Settings → Sync and enable items as needed. Turbo accounts can sync bookmarks, passwords (including Passkeys), browser settings, extensions, and NTP My shortcuts (incremental sync; does not sync browsing history; bookmarks and passwords can be toggled separately); Google accounts use Google Sync.
- First sync may take a few minutes — keep a stable network connection.
TIP
Sync requires a network connection and a signed-in Turbo or Google account. If it fails, check network and account status, then retry later. See Sync for details.
7. Stores & extensions
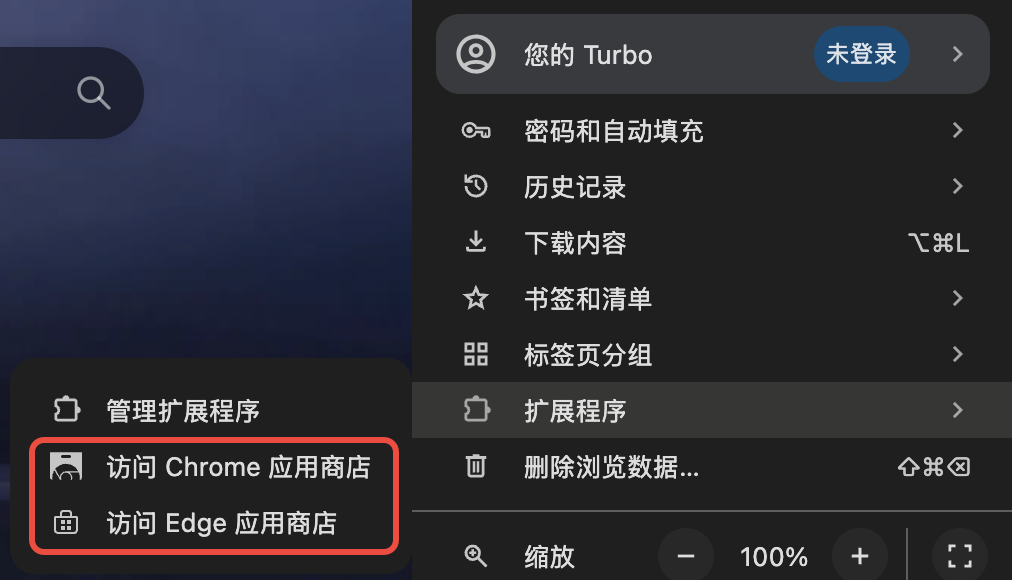
- Open Menu → Extensions to visit the Chrome Web Store or Microsoft Edge Add-ons.
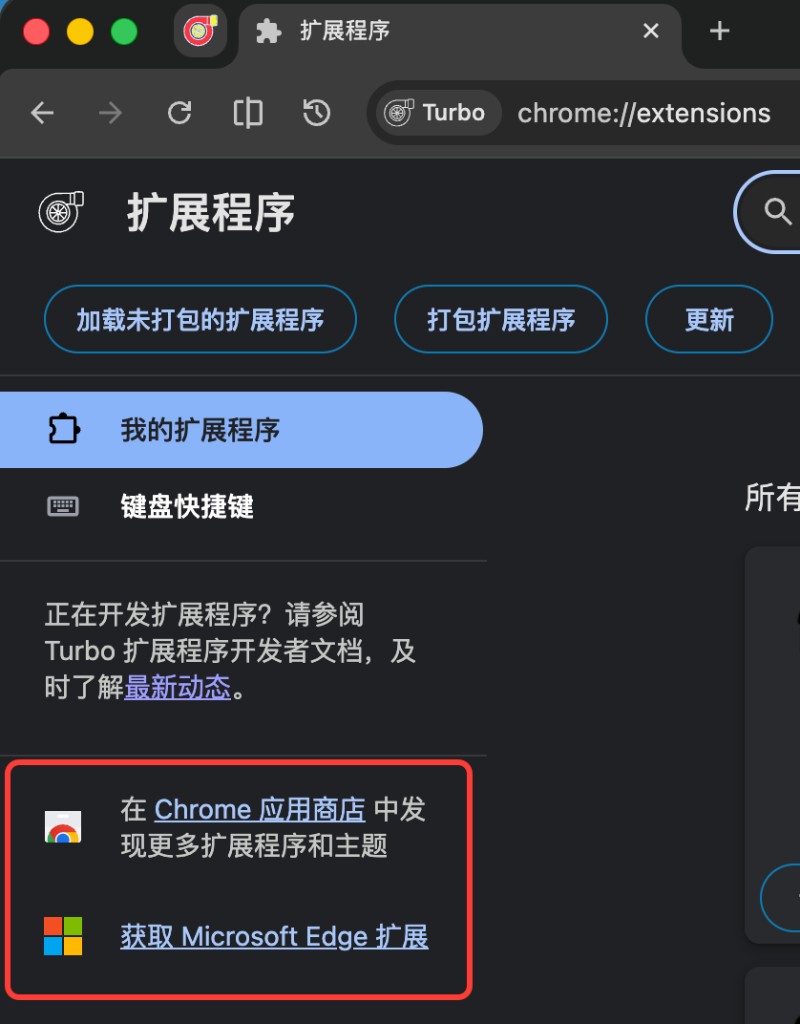
- Or open the Extensions page (
chrome://extensions) and use the store links at the bottom; the sidebar also opens Crx搜搜 for one-click.crxinstall.
Right-click a toolbar extension to disable it; re-enable from Disabled extensions in the puzzle menu. See Extensions.
Ad blocking
To block ads on the web, click the button below to download the extension and follow the browser prompt. See Extensions → Ad blocking.
Web translation
Built-in translate: Use the page context menu or the right side of the address bar for whole-page translation.
For bilingual reading and more advanced features, install Immersive Translate. See Extensions → Web translation.
8. Parallel download acceleration
Open Settings → Downloads (or chrome://settings/downloads) and confirm Enable parallel download acceleration (on by default). Large downloads are usually faster; turn it off temporarily if a site misbehaves.
The same page also covers Xunlei / IDM handoff and Alt + left-click quick-save images. Full guide: Download enhancements.
9. Network proxy
To use the system proxy or a custom proxy, open Settings → System:
- Enable Use system proxy to follow OS proxy settings
- When disabled, click Custom proxy to set the server and bypass list
- On the same page, turn on Use a custom cache location to pick a cache folder (restart required)
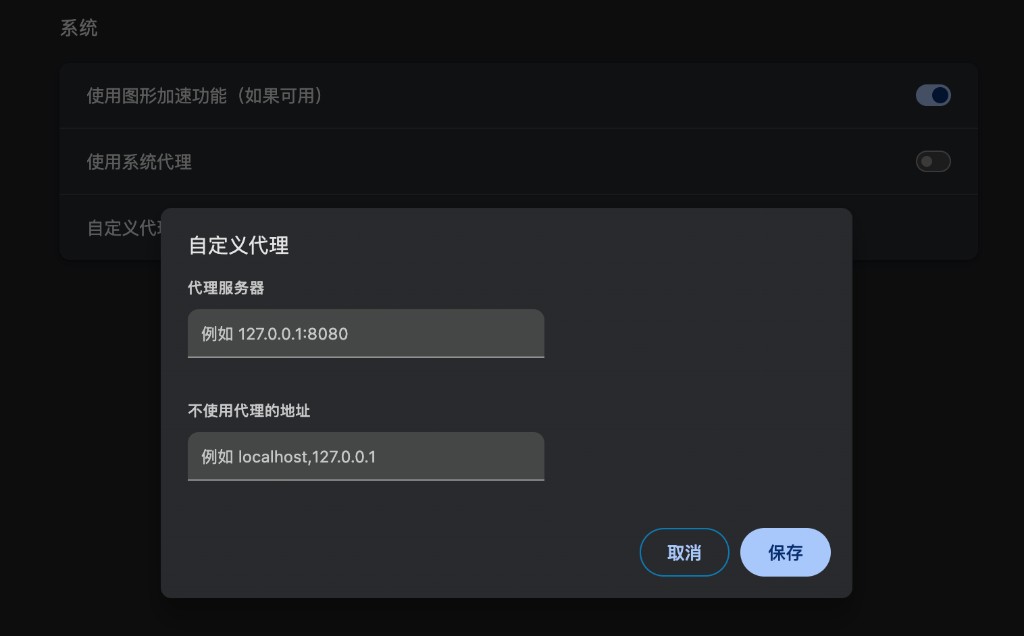
Network proxy: enable system proxy in Settings → System, or configure a custom proxy server and bypass list
See Features → UI & productivity for details.
10. Check for updates
Turbo includes built-in update checks. You can also download the latest installer from Download, or see the Changelog.
For gestures and shortcuts, see Mouse gestures and Shortcuts; for quick tips, see Practical tips; for FAQ, see Help Center.